Please do not share screenshot of your devtools to others if you are not totally sure about it. It might contain sensitive personal data.
1. Open Chrome DevTools
The first thing you want to do is to open chrome devtools. It provide much useful information about the opened website, we would use it to extract the data from the game.
Press F12 to open the devtools, a new window will pop out in chrome. It should come up at the bottom in default, but it can be on other side according to your personal setting.
Optional: Open in separate window
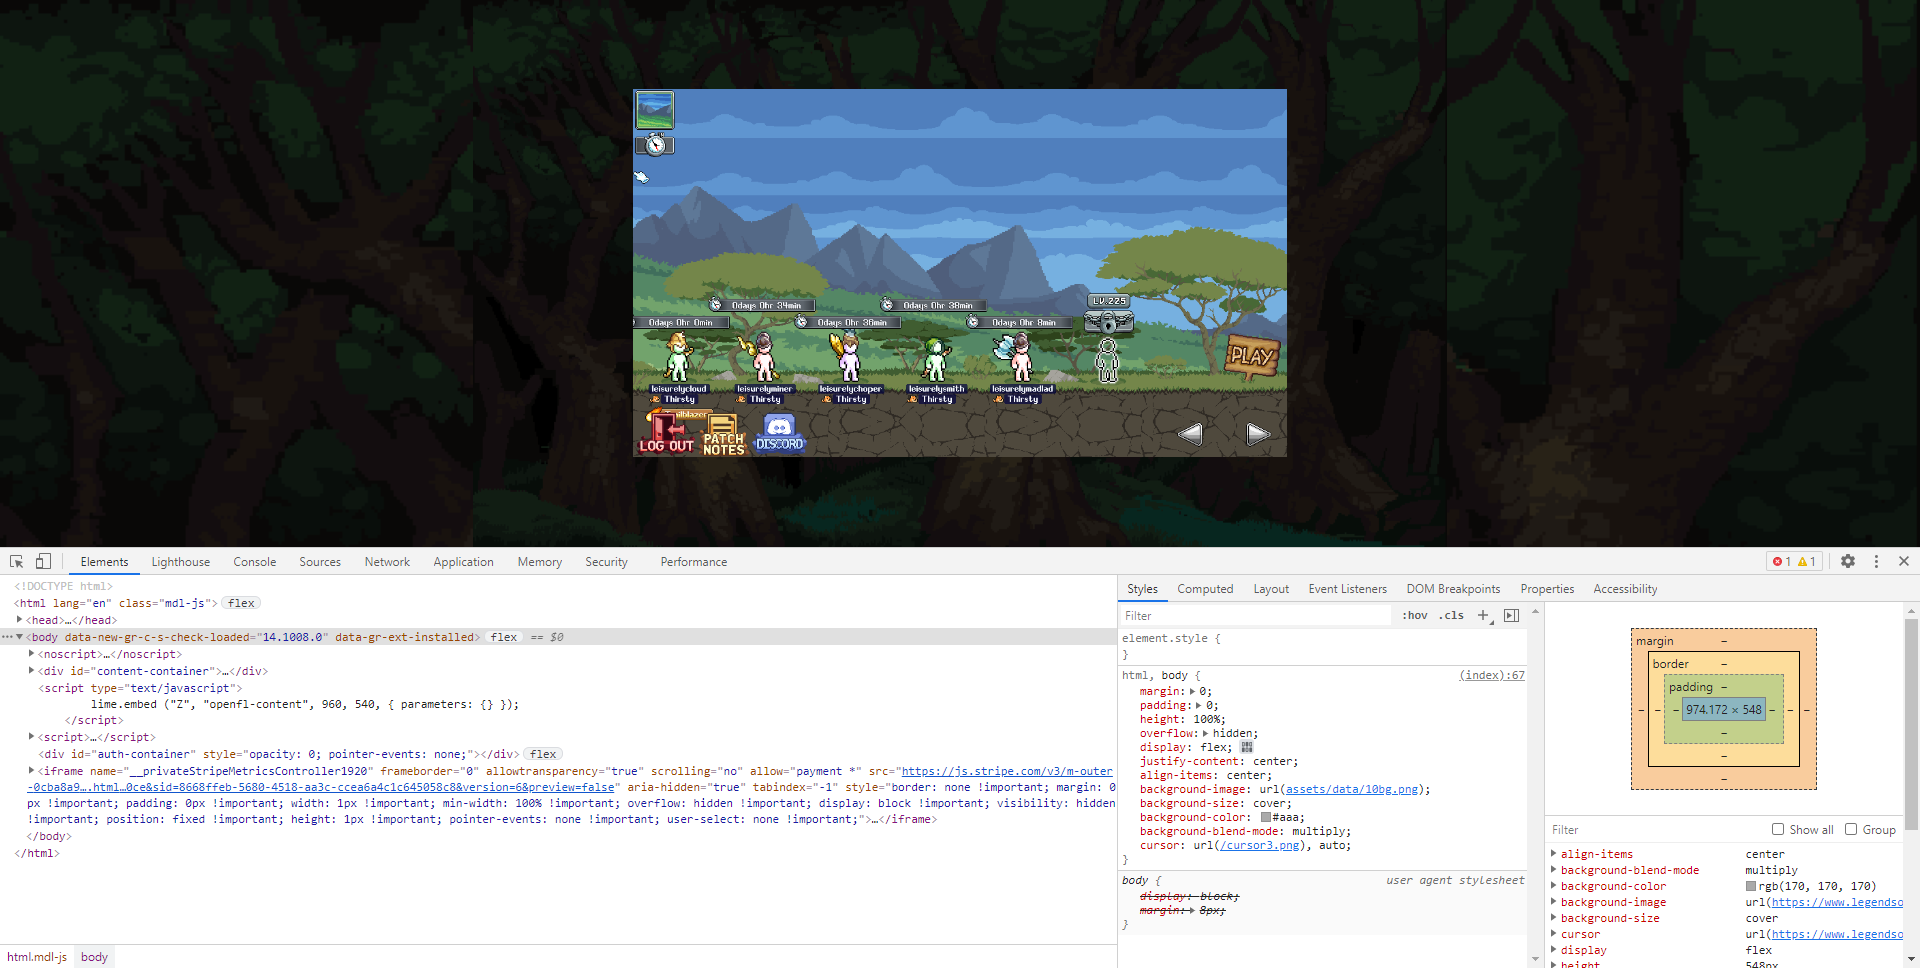
I would suggest you to open the devtools in a separate window so you can work with it a bit easier. To do this, find the triple dot icon on the top right corner of the devtools, and select dock to separate window in the menu.
You would see the devtools separate from your browser window, which you can freely resize it. Now refresh the game with devtools open, so we can capture the guild data.
2. Locate Data
Then go in game and open the guild tab. I believe you are smart enough to figure out how to do it ;)
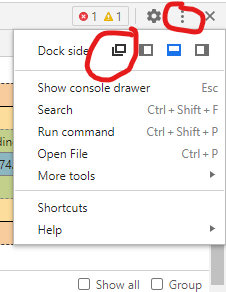
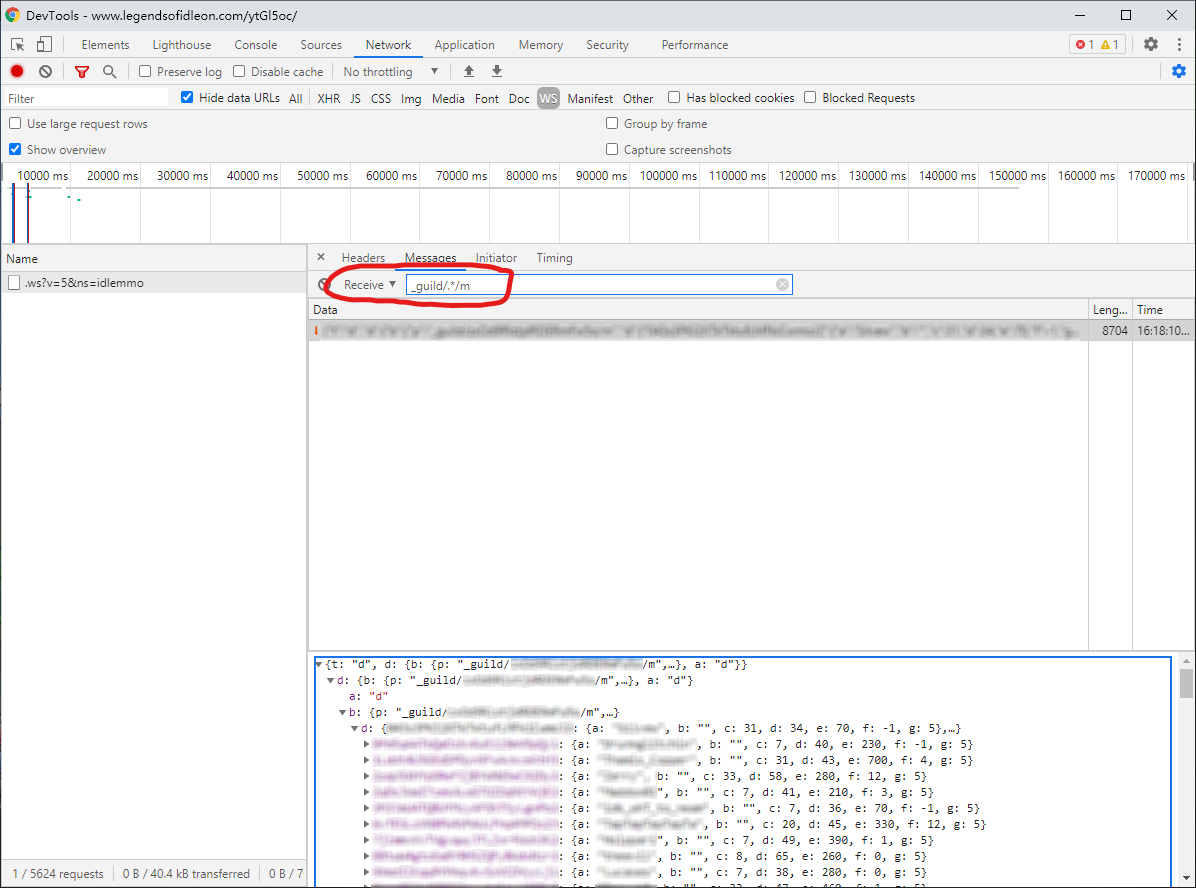
Back to devtools, you want to open the network tab. Here you will find the records of all your network activities.
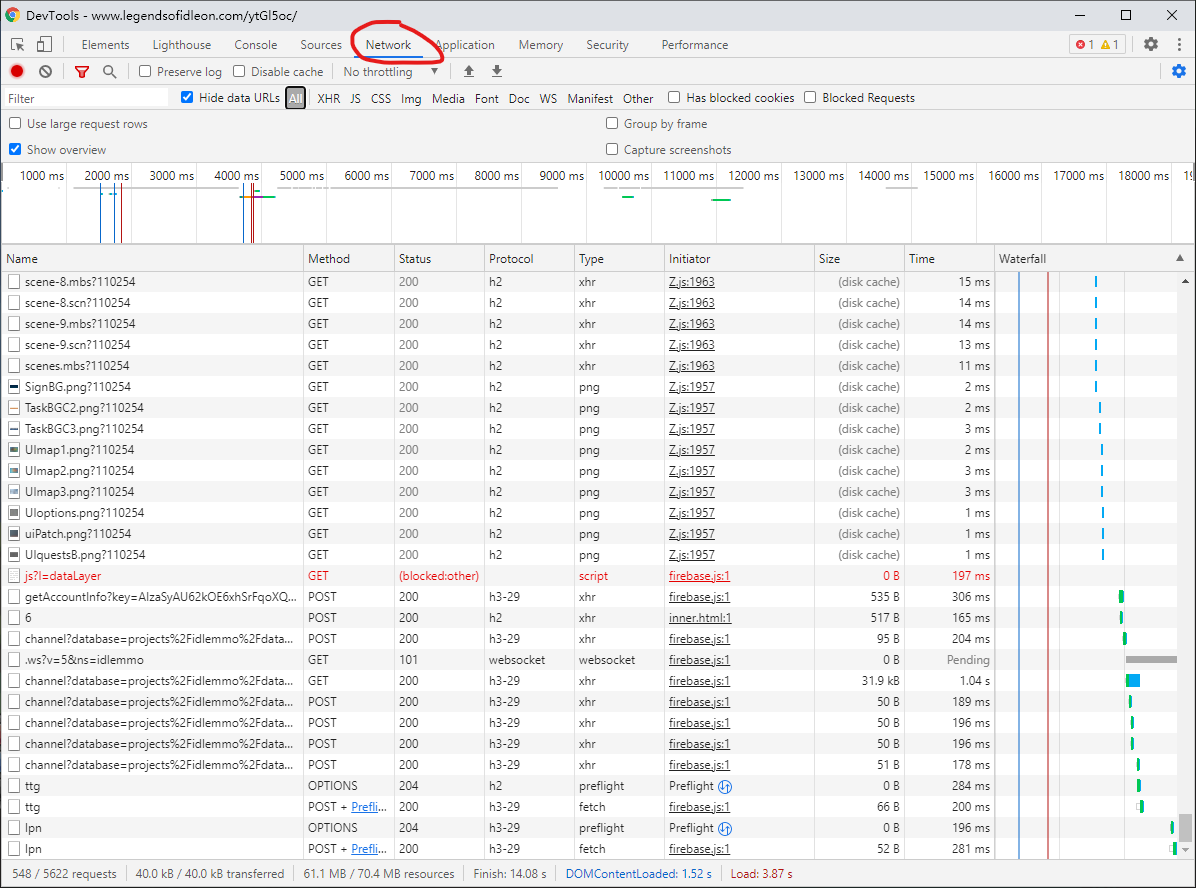
We need to filter out the one we actually need. Click the WS filter button in the devtools, and there should be only one item left. And then click on that item Name to view the detail of it.
Still too much information here, we need to do some filter again. This time, set the type filter from All to Receive, and enter _guild/.*/m (exclude the backtick) into the search bar.
There should be few items left, you want to find the one with the longer length (shown at the second column), you may want to check it's content, which should look similar to the one in the picture.
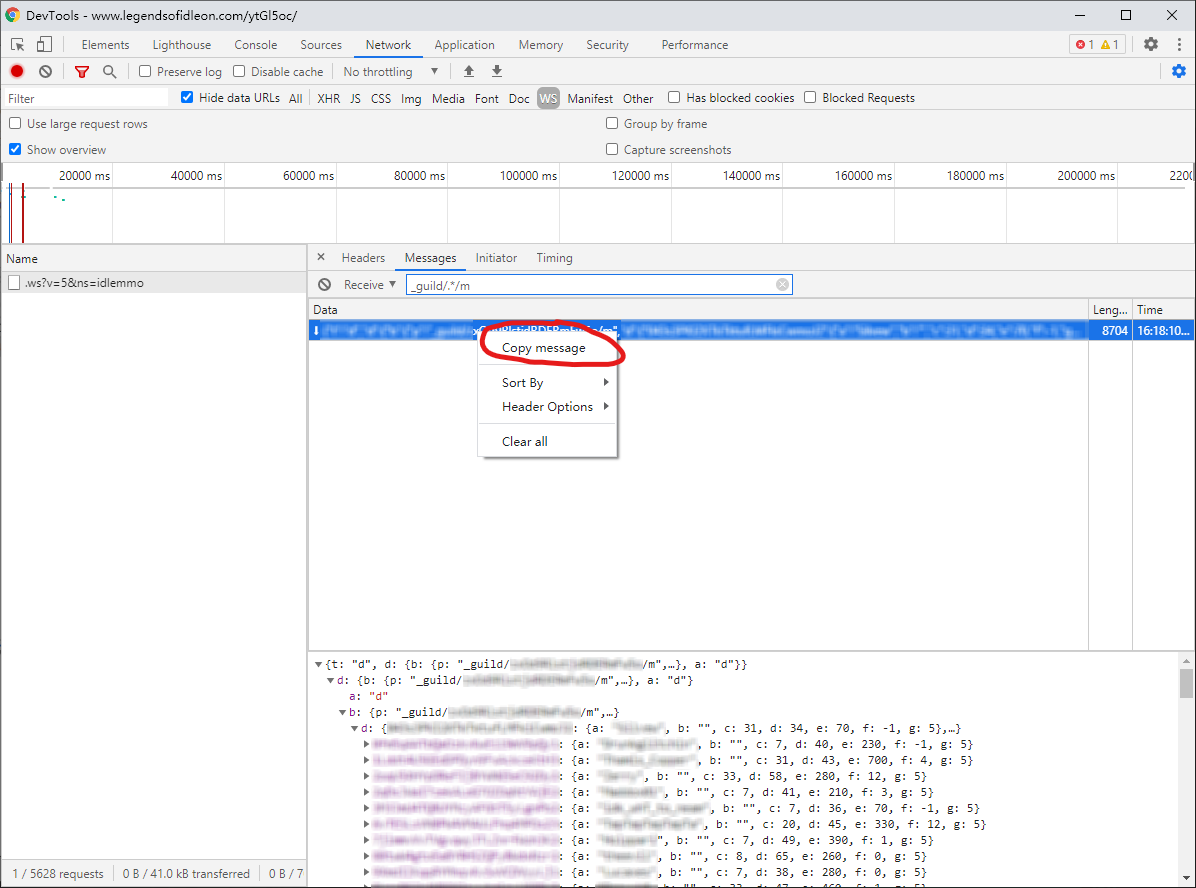
Once you find the correct item, right click on it and select copy message.
3. Data to Google Sheet
Convert Data
Google Sheet is a free solution that can help use manage the guild gp data. I have made a template for you to use, you can get it from the header bar of this site. You should make a copy to your own google drive.
But the raw data we copy from the devtools is not suitable to use in Google Sheet, so i created a simple to to covert it for you. Go to the convert section of this site, paste the raw data into the big text box. Then you want to click the Get Data Entries button first, if there is no error the converted data should be copied to you clipboard now.
Enter GP Record Data
Head on to the Google Sheet and find the DATA ENTRY sheet. Paste the data in the top left empty cell under the header. In the paste option you want to choose Split text to columns

Repeat this process for future data entries. But do not overwrite current records, paste them to the empty row following the existing rows.
Name Table
We record the players using their player id, but we would want to know their player name too. Back to the convert page and click Get Name Table, and repeat the step but this time paste to NAME TABLE sheet. You only need to do it once, or when you need to update the name in case someone change their display name.
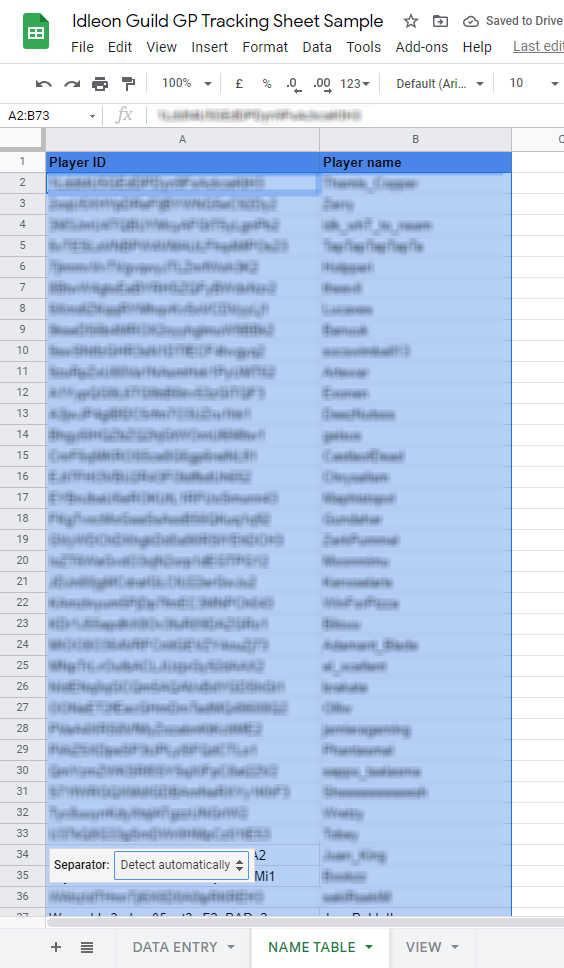
You will see the player name generated in the orange column of the DATA ENTRY sheet.
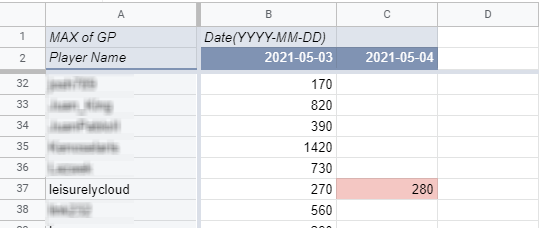
View Statistics
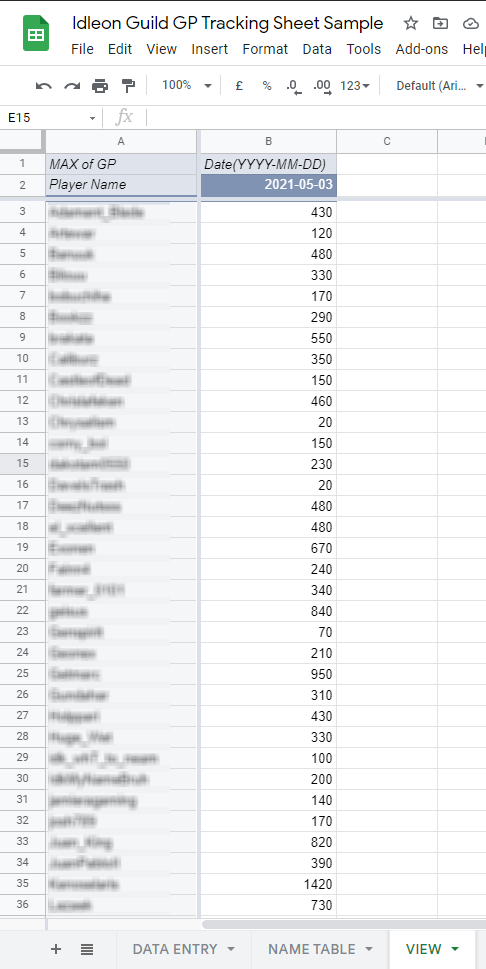
To have a nice table view of the gp records, go to the VIEW sheet.
Hightlight Unmet Requirements
There is one final function that can help you to find out the player that did not match the GP requirement. In the DATA ENTRY sheet there is a green box that allow you to set the target amount of GP required between each record interval.

For example if I get 10 GP for today, and the requirement is 20 GP per day. When next day record is added, my record would be marked in red color in the VIEW sheet.
Thats all i want to tell you. Thanks for wasting your time reading my horrible English and i hope my tool is useful for you.